Showing posts with label crafting. Show all posts

Tuesday, August 7, 2012

Twisty Flower Tutorial on My Youtube Channel

Well hasn't it just been months since I've uploaded a tutorial video??? I know! I'm working on getting better with that, I promise. I'm actually updating the blog regularly, see? So I am trying!

The new tutorial is easy and works with 5 or 6 petal big or small flower punches, die's or personal electronic cuts. You can check the entire video out here: My Youtube Twisty Flower Tutorial Video

The simple steps broken down into images if you don't feel like going to Youtube. 

Start with the tweezers in the
center of the petal and twist.
Like this!
Make four flowers all twisted up
Add a blob of glue (I used a hot glue gun to go faster)
in the center of the flower.
Stick the next flower on top and repeat glue/flower layering.
After four layers this is what you have.
Add a button, bead, seed beads, or bling to the center.


Friday, August 3, 2012

Maskquerade Mask Swap @ LSH

I created the masquerade mask swap at LSH because I collect them and wanted to try my hand at making them. I LOVE how this one turned out and honestly, if it wasn't pink, I'd be really sad to see it go! LOL

The idea behind this mask was that I got a blue cracked paint mask up at the Dells on vacation last month. My partner loved pink and I wanted to try to replicate the blue one I picked up. I just LOVE how this turned out (and if it wasn't pink, I'd be hard pressed to send it! LOL) I TOTALLY love how the silver swirls turned out and the stick is detachable so it's easier (and smaller) to mail. I LOVE LOVE LOVE the feather spray on the side! 

Had a blast making this! I really hope my partner likes it as much!!! :)

Ryder had to try it out!
I don't think it's his color!


Peek-A-Boo!


Sunday, July 29, 2012

Dresser for Dresser Swap

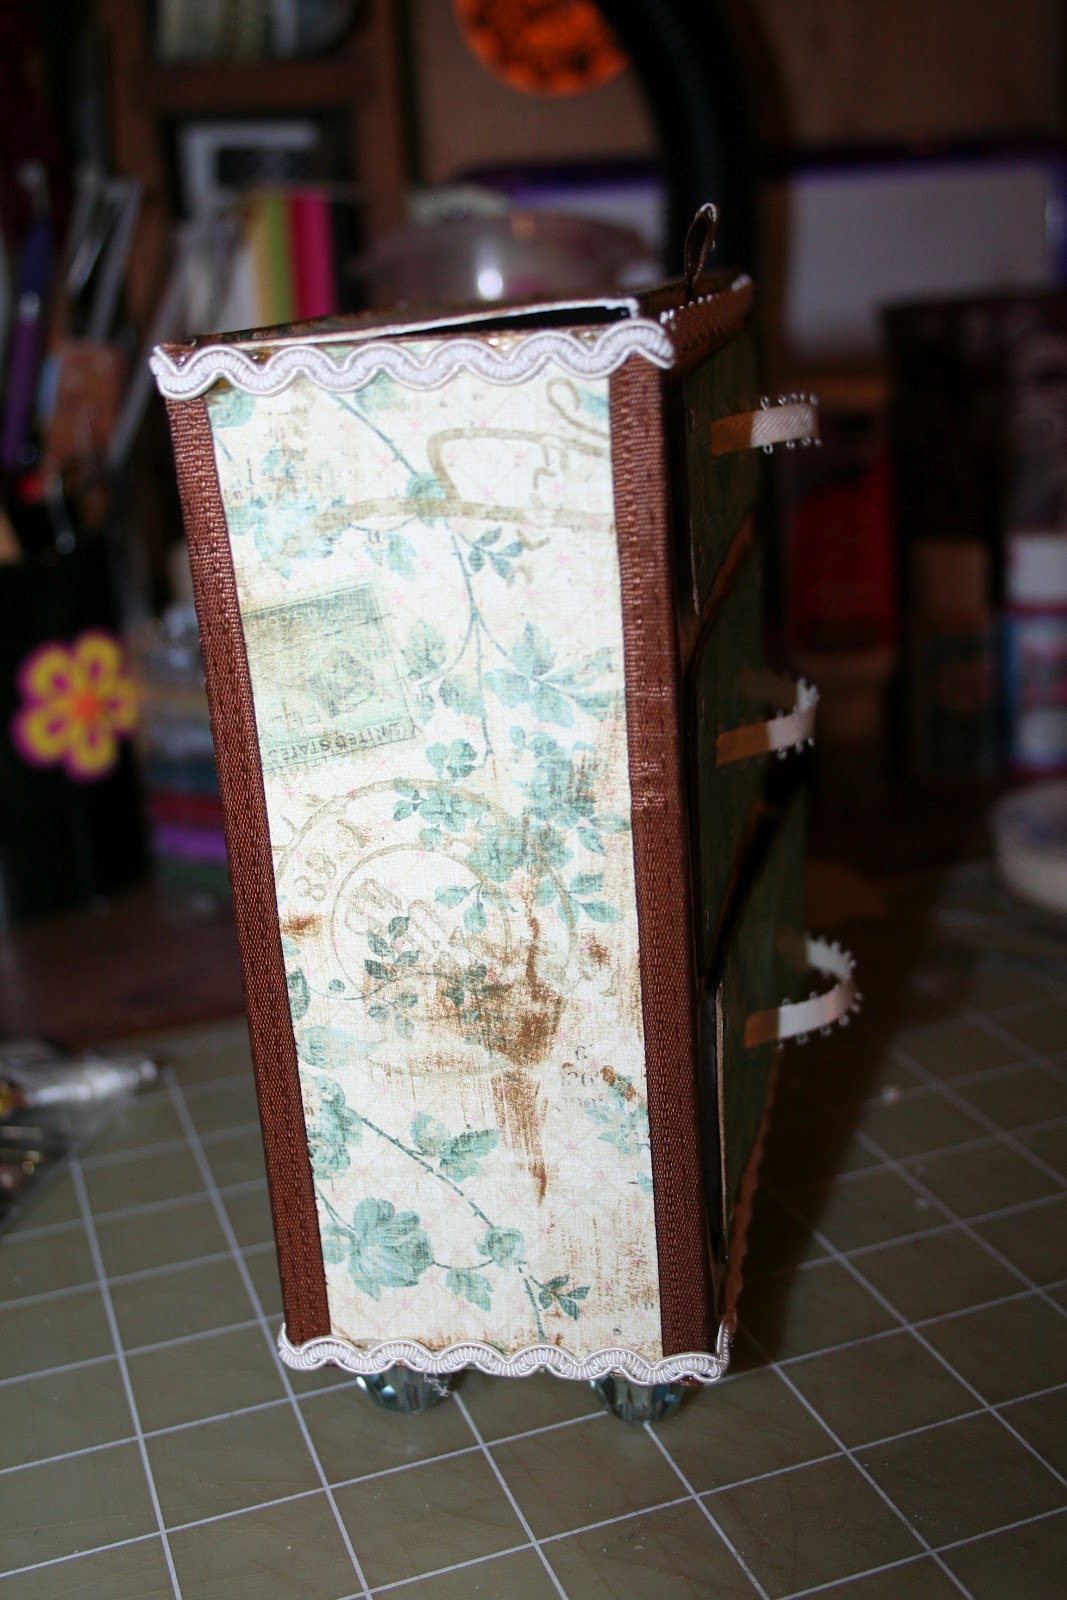
Here's the dresser I made for the July dresser swap here on LSH. I love it so much that I'm having a hard time parting with it! LOL (I'm glad I have enough paper and trim to make myself an identical one!)

 What I did different than the first one I made:

  • I created the files in Illustrator and turned them into SVG's to cut on my Cricut. Made it so much easier to square everything up and have things go together perfectly. I even included score lines so I knew where to fold. 
  • I lined the inside of the drawers and used white gesso for the inside of the top part and the outside of the drawers to hide the cereal box I was using. (Okay, frozen pizza box from the most amazing chicken alfredo pizza!) 


 Supplies used: 

  • Papers by K & Co and Recollections. (Cream paper is K & Co and turquoise paper is Recollections.) 
  • Brown seam binding 
  • Wavy trim from Michael's $1 bin Cream ribbon from Michael's (don't remember the brand) 
  • "Feet" are from the $1 store "table scatters" I found a few months ago and match the blue perfectly! 
  • Metal studs for my iRock 
  • Vintage Photo Distress Ink


Monday, June 11, 2012

Robin's Nest DT Submission *crosses fingers*

When things go wrong they go really, really wrong!!! I had all intentions to have it posted first thing in the morning as I finished up a project late last night. Unfortunately for me, I ended up screwing my knee up something awful and spending the entire morning in the doctors offices. (Yes, plural! And YAY for me, I'm 35 and have severe arthritis in my left knee (that wouldn't have been found if I hadn't messed my knee up, so I guess in a way it was a good thing... or something like it.) I will be needing total knee replacement, but because I'm only 35, I don't even qualify as a candidate currently and my only ***ONLY*** option is cortisone shots. Seriously...it hurts like h**l folks. I'm not even supposed to be sitting at my computer right now, but I'm determined to get this posted. If it's too late for submission, fine, I think it's still an awesome project and I started it before I even heard about the DT call at Robin's Nest! (Which I have been eyeballing their Dew Drops for a while now! Goodness, I <3 bling!)

Anyway - on to the project!

The template for this mini dresser is available at A Lil Scrap of Heaven. (Monthly subscription of just $1 is required to get access to the template, but it's so worth it! These ladies are *AMAZING* I <3 this site almost as much as I <3 my computer or camera! LOL)

Don't pick on the photos. I'm hopped up on pain killers and only had the lil Kodak not my good Cannon and I sure as heck couldn't walk the block and a half that is my building to go shoot this outside like I normally would. :( In all fairness, these photos are horrible, I apologize now! LOL

When I picked up Graphic 45's Communique paper I was in love INSTANTLY! I have been hoarding this pack for just the right projects. I think this paper is perfect for the mini dresser (that now holds all of my lil chipboard die cuts!) I just adore the vintage feel and the writing and old advertisements. It doesn't hurt that I'm a fool for harlequin patterns either! *le sigh* Don't get me started on fleur de lis either! LOL 

I did a lot of glitter glue swirlies on this. I've been getting more and more into sparkle, bling, glitter lately. Oh the irony since I'm not a girly girl! And another new favorite of mine is iamroses.com flowers. OMG!!!! The photos do not do these flowers justice! (A side note, the white and off white ones color really well no matter if you're using Glimmer Mist or paint.) I think I have stuck a few on all of the projects I've done recently! I'm so gonna have to order again soon!) 


Products Used:
Graphic 45 Communique paper pack (School Days paper pack - ABC stamp paper)
iamroses.com flowers
Recollections bling
Stickles & Studio G glitter glue
7 Gypsies washi tape
Princess Crown die cut (don't remember the manufacturer off hand)
Ranger Glossy and Crackle Accents
Fleur de Lis from a pack in Michael's dollar bins
Drawer pulls and "feet" are from The Dollar Store (pack of "table scatters")


Wanna make your own? Easy!!! Just download the template from A Lil Scrap of Heaven and cut it out on chipboard (or like me, cereal boxes!) add paper and decorations and viola!! 

Technique tip: Weathered Fleur de Lis 
Step 1. Paint chipboard cut out with a base layer (any color, mine was red.)
Step 2. Paint again with top color (any color, mine was black) 
Step 3. When dry, sand lightly with fine grit sand paper or emery board. 
Step 4. Coat with Crackle Accents, Tim Holts Distress Crackle Paint or similar. (I used clear, but you could use a colored crackle paint if you wanted a third color.) 
Step 5. WAIT! Seriously, don't use your heat gun to speed up the crackle finish. I learned this the heard way a long time ago. It creates bubbles under the top "skin" and it won't crackle right or becomes cloudy. 


Project posted for entry into The Robin's Nest Design Team
The Robin's Nest Blog

Monday, March 26, 2012

Key to My Heart

WOOT WOOT! Y'all are excited, eh? The first download with the new blog!!! I've been busily creating stuff now and have for your download enjoyment an SVG file that will work with SCAL (Sure-Cuts-A-Lot) and MTC (Make the Cut.) I haven't tested in MTC as I have SCAL 2, but it should work the same. I know I'm a little late for Valentine's Day, but I figured what the hey, I'm always using keys in my stuff lately! Something I'm totally obsessed with!!!

The zip contains both the png files for those who want to print them out and hand cut them. (See, I thought of those who don't have a Cricut, Eclips, or similiar!)


DOWNLOAD:

Monday, March 19, 2012

March iamroses Color Challenge - Green, Gold & Glitter!

I finally got my first shipment of iamroses flowers! OMG! I should have waited and done a haul video, but I was too excited and couldn't resist tearing into it when it came in! Okay, that was a few days ago! I've been busy, busy, busy creating with them and doing family stuff! As promised, I have new stuff to show off. I should have had these up a few days ago but better late than never, eh?

I made a cute wreath for our door for St. Patrick's day and it's highlighted with some lovely iamroses.com products and some things I cut out on my Cricut.

iamroses.com products used:
CA1-151 - 50 White Carnation
S10-15 - 100 Small White Flowers
ZQL0-151 - 100 White Roses Leaves
The top flower was made with 3 layers of the gift they sent me! I wish I knew what it was so I could credit it!


How to Make: 
I took an old embroidery hoop and wound 1 skein of Martha Stewart green fuzzy yarn around it to create the base of the wreath. I made the "sprays" with some old beads I had laying around.

 I took some thin wire (don't know the gauge, but it's pretty thin and pliable.) and put it through the 1st bead and looped it around and then slid the other beads on and hot glued them in place on the wire. 

The top hat was cut designed in Illustrator and cut out on the Cricut with Sure Cuts A Lot 2 and the pot of gold was downloaded from the web (I wish I could remember where for you guys!) and then cut out on the Cricut. 

I glittered the buckle, top layer of the pot and the edges of the top layer of the gold to make them sparkle!!! I used my home made glimmer mist on the white flowers to make them slightly antiqued and very shimmery and used actual Glimmer Mist on the leaves. The white flowers on the hat were rubbed across a green ink pad. 

For the top flower I used 3 layers of the gift the folks over at iamroses.com sent me. (If anyone knows exactly what product this is, let me know because I love them!) I inked the edges of the petals with the same dark green as the flowers on the hat and then used my embossing stylus to curl up the petals. I stuck a brad in the center and glued it onto the wreath to hide where the ribbon hanger attaches on the screw part of the embroidery hoop. 

Monday, February 13, 2012

New Projects!!

WOOT WOOT! I'm all kinds of excited to be able to post some new projects that I've done in the past couple of weeks. I finally found some time to get some real crafting done and have managed to get a few spiffy things done. I'm hoping by next year at this time I'll have a beautiful blog, lots of amazing new site readers and a bazillion photos of new projects, downloads, files, etc for y'all! (Well that and I so want to enter next years Graphic 45 design team call) On to the photos!!!! First - a notebook I made for my mom. It was my first time using the Bind-It-All that I got for my birthday. Also used the IRock setter to set the studs.
This is probably the first project I did. A wreath for Valentine's Day. I love how it turned out. The papers are a set that I created From Paris With Love and the kit will be available soon on my Etsy shop. (Maybe another shop if I can find a good website that I can call home!)
I have a couple more that I haven't taken pictures of yet. I thought I did, but I do have the video up on YouTube.

Wednesday, January 11, 2012

New Year - New Blog!

New year...reNEWed vigor in crafting/designing! In the past year we've moved into a new building. One that is geared towards artists! I'm so excited about the move. I've really been getting back into crafting and designing since getting in here. :) I now have my own craft area. It's flippin' amazing! I'm so lucky to have such a wonderful space! I got my first Cricut. A 6x12 Personal Cutter second hand and fell in love with it. I started designing SVG files in Illustrator and have been having a ball with those. Ended up getting a WONDERFUL deal on an Expression. (Thanks to my loving Uncle who picked it up for me and let me pay him back for it!) I'm the proud owner of an acid green Expression. (K, the color could have been purple, but I'll live. It's a flippin' Cricut!) I finally finished a new project. I made a wall hanging for Jeremy. :) I love how it turned out and I'll have to post pics later of it finally hanging up after I figure out where to put it. LOL